Photo: Belén Fleming of Belu Photography
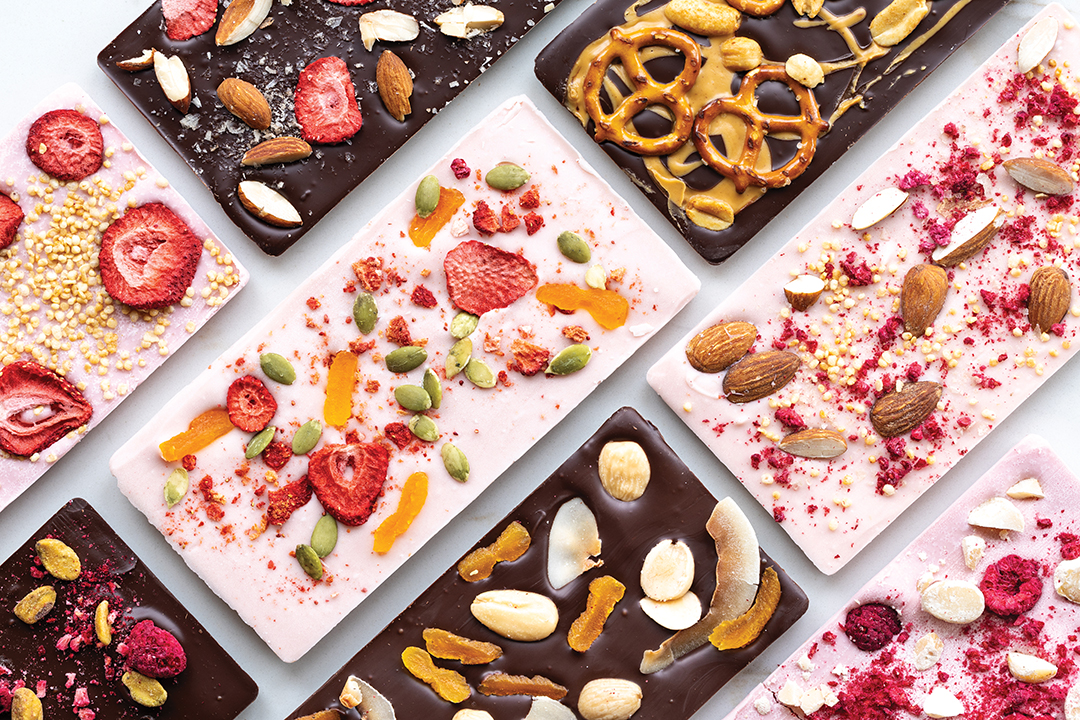
Nothing says Valentine’s Day like chocolate, and gifting healthier Homemade Chocolate Bars is the perfect way to let your loved ones know how special they are to you. These are fun to make because you can customize them with the type of chocolate you like and any additions you desire. Dried and freeze-dried fruits, puffed quinoa, nuts, salts, seeds, spices and toasted coconut are all great options.
I like to make chocolate bars, using real chocolate, which is made of cocoa mass and cocoa butter. Compound chocolate, which is sold as almond bark, confectionery coating or melting wafers, is made of cocoa powder and vegetable oil. Real chocolate is superior in quality but also requires the extra step of tempering, which ensures the chocolate will harden properly and keeps it from developing bloom, the white/grayish blotches, coating or streaks. It is perfectly safe to eat bloomed chocolate, but it gives the bar an unappetizing appearance.
Purchase pure chocolate in bars, blocks and callets, which are drops in the shape of small buttons or wafers. For my recipe, I use Callebaut dark semi-sweet callets for the dark chocolate bars and Callebaut white chocolate callets or Ghirardelli white chocolate bars for the pink chocolate bars.
Notes:
- Chocolate chips will not work for my recipe because they have added stabilizers, making them hard to temper.
- Make sure molds and kitchen tools are completely dry, and do not let any water get into the chocolate. Even a little water can make chocolate grainy.
Homemade Chocolate Bars
- 8 oz. dark chocolate, finely chopped or callets
- 8 oz. white chocolate, finely chopped or callets
- Red natural food coloring
- Desired add-ins
Dark Chocolate Bars:
Fill a pot with an inch of water and bring to a light simmer. Place two-thirds of the dark chocolate in a glass or metal bowl and place over the simmering water, ensuring the bottom of the bowl is an inch or more above the water. Continually stir the chocolate with a spatula until it is completely melted except for a few solid pieces. Place the bowl on a dish towel to absorb the moisture that has accumulated on the bottom of the bowl. Add the remaining third of the dark chocolate and continually stir until completely melted and smooth.
Place 2 clean and dry silicone bar molds on a cookie sheet. Using a spoon or small ladle, pour the chocolate into the molds. Use an offset spatula to smooth the top, removing excess chocolate. Add any toppings you like to the chocolate before it sets. Place the cookie sheet with the chocolate bars in the refrigerator for 15-20 minutes or until set.
Gently peel the molds away from the chocolate bars. Slide a chocolate bar into a clear cellophane bag, folding and taping the excess in the back. Tie some twine or a ribbon around the bar and add a personalized note or tag if desired.
Pink Chocolate Bars:
Fill a pot with an inch of water and bring to a light simmer. Place two-thirds of the white chocolate in a glass or metal bowl and place over the simmering water ensuring the bottom of the bowl is an inch or more above the water. Continually stir the chocolate with a spatula until it is completely melted except for a few solid pieces. Place the bowl on a dish towel to absorb the moisture that has accumulated on the bottom of the bowl. Add the remaining third of the white chocolate and continually stir until completely melted and smooth. Add a few drops of red natural food coloring and stir until well combined. Add additional drops to achieve the desired color.
Place 2 clean and dry silicone bar molds on a cookie sheet. Using a spoon or small ladle, pour the chocolate into the molds. Use an offset spatula to smooth the top, removing excess chocolate. Add any toppings you like to the chocolate before it sets. Place the cookie sheet with the chocolate bars in the refrigerator for 15-20 minutes or until set.
Gently peel the molds away from the chocolate bars. Slide a chocolate bar into a clear cellophane bag, folding and taping the excess in the back. Tie some twine or a ribbon around the bar and add a personalized note or tag if desired.
Emily Maxson is a Plymouth food blogger and author of Emily’s Fresh Kitchen Cookbook. For more recipes, visit emilysfreshkitchen.com, or follow her on Instagram @emilysfreshkitchen.


![“The design inspiration came from artist Briana Auel’s piece [Concrete Jungle//Glass Ceiling]—its modern lines, vintage gold frames and palette of greens, pinks, and blues set the tone for the entire room,” Andrea Soule says. “To layer in fun, I painted the fireplace in Breakfast Room by Farrow & Ball, displayed art we’ve collected over the years and incorporated antique pieces inherited from Chase’s grandmother [Anne Hull].” Her father, Charles Soule, created the stained-glass entrance to the room, partnering with Down Home Stained Glass in Anoka.](https://plymouthmag.com/wp-content/uploads/2026/03/AndreaHeadshots-61.jpg)